Deploy rendering sets across a network
Change the colours and formats Workshare uses to show changes in the Redline and deploy them across a network or set as default rendering set
Customize a rendering set
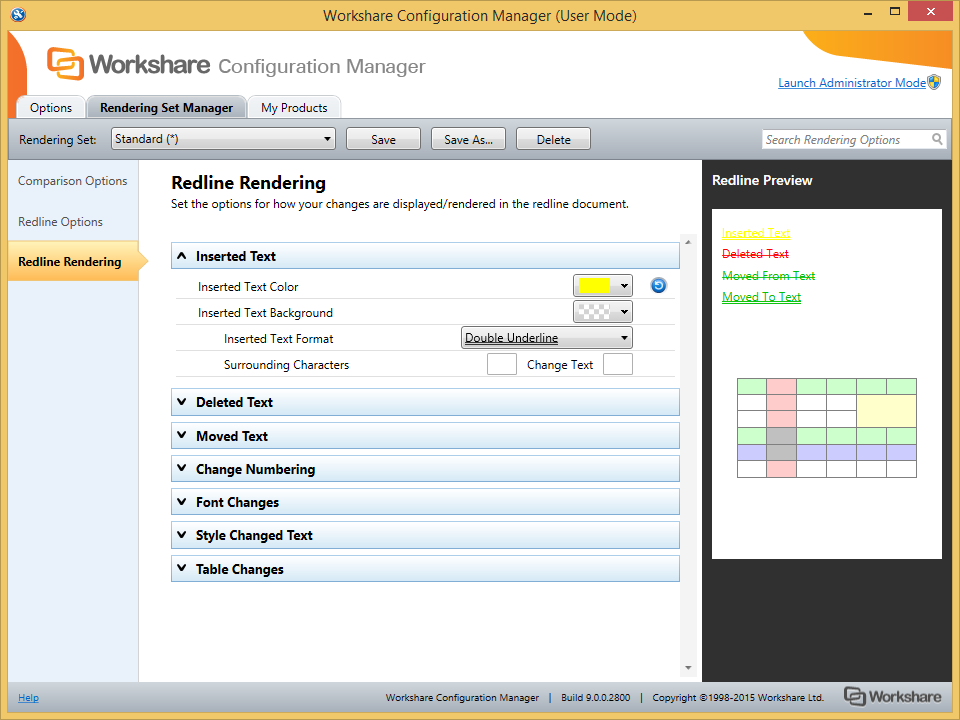
Workshare Compare uses colors and different formats in the Redline to enable you to see the changes that have been made to the documents. You can change the colors and formats to suit your company branding by creating your own rendering set.1. Open the Workshare Configuration Manager.
2. Select Rendering Set Manager.
3. Select Redline Rendering and alter the colors and format as required.
4. Adjust other rendering set parameters as required.
5. Click Save As and give the rendering set a name.
4. Adjust other rendering set parameters as required.
5. Click Save As and give the rendering set a name.
Deploy the new rendering set
By default, the rendering set you have saved is stored here:
%USERPROFILE%\Documents\Workshare\Rendering (although this is configurable in Workshare Configuration Manager for Admins).
%USERPROFILE%\Documents\Workshare\Rendering (although this is configurable in Workshare Configuration Manager for Admins).
1. Manually copy the file to your preferred network location.
2. Use your preferred method for deploying the rendering set across your network. For example, in a .bat file you may use the following command:
copy "\\<NETWORK LOCATION>\<path>\*.set" "C:\Users\Public\Documents\Workshare\Rendering\*.*"
Specify a default rendering set
1. To set a specific rendering set as the default, launch the Workshare Configuration Manager (Administrator Mode).
2. Select the Comparison > Administration category and enter the name of the rendering set (in this example 'Palma Partners') here:
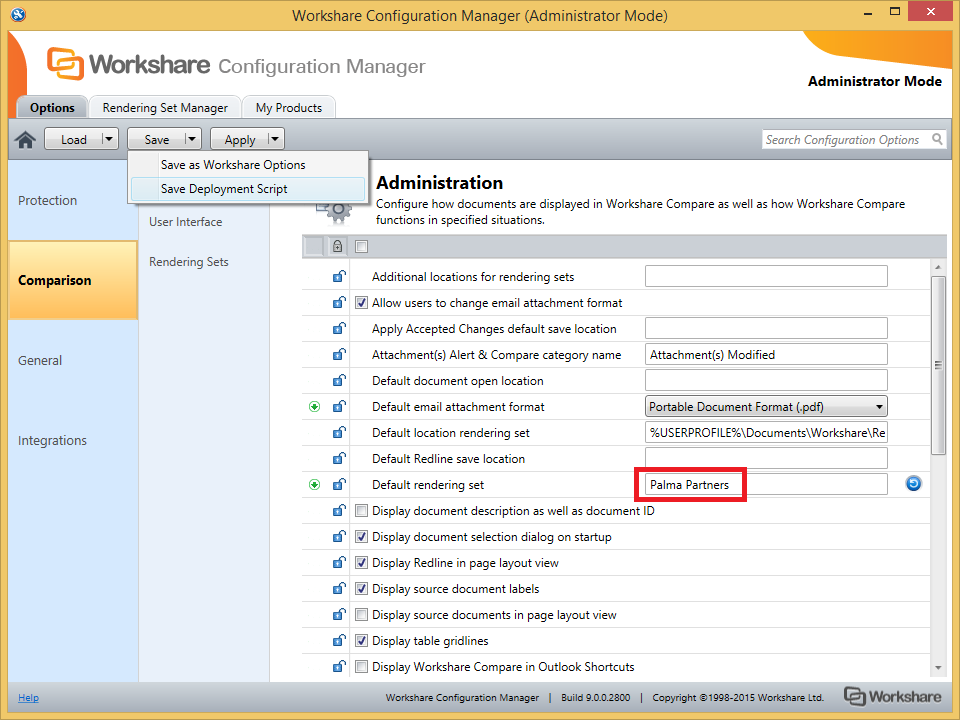
3. Select Save Deployment Script.
4. From the Generate Script dropdown list:
2. Select the Comparison > Administration category and enter the name of the rendering set (in this example 'Palma Partners') here:
3. Select Save Deployment Script.
4. From the Generate Script dropdown list:
- If you have an existing deployment and you want to save and deploy just the "Default rendering set" option then choose For options with deployment icon.
- If you want to deploy all settings for a new deployment and to generate a new “workshare options” file, choose For all options.
5. Specify a save location and click Save.
6. Deploy the resulting .reg/.adm file along with the copied rendering set (.set file) using your preferred method. (e.g. silently within the same batch file or as part of a deployment script, Group Policy, SCCM, etc.)
Environments
Workshare Products
Professional;Compare;Workshare 9