If you're using...
Workshare 9.5, 9
NetDocuments
|
In order to maximize the integration of Workshare in NetDocuments, you should add Workshare as an application to your NetDocuments cabinets. Workshare will then be available when using the NetDocuments Send to application functionality.
Note: Before following these steps, you must have Workshare 9.5 or Workshare 9 installed with the NetDocuments integration. For instructions on installing the NetDocuments integration, see the Workshare 9 & NetDocuments User Guide.
To add Workshare as an application:
- Click Admin in the top right of the NetDocuments window.

- From the Cabinets list, click the cabinet you want to add Workshare to.
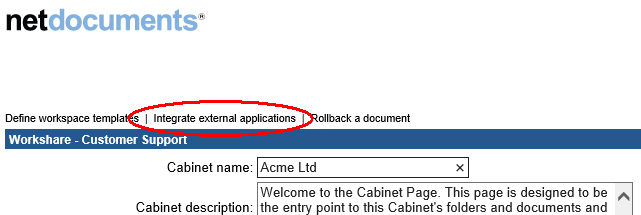
- Click Integrate external applications at the top of the page.
- A list of available published applications is displayed and you can select the app you want to be available in the Send to Application dialog.
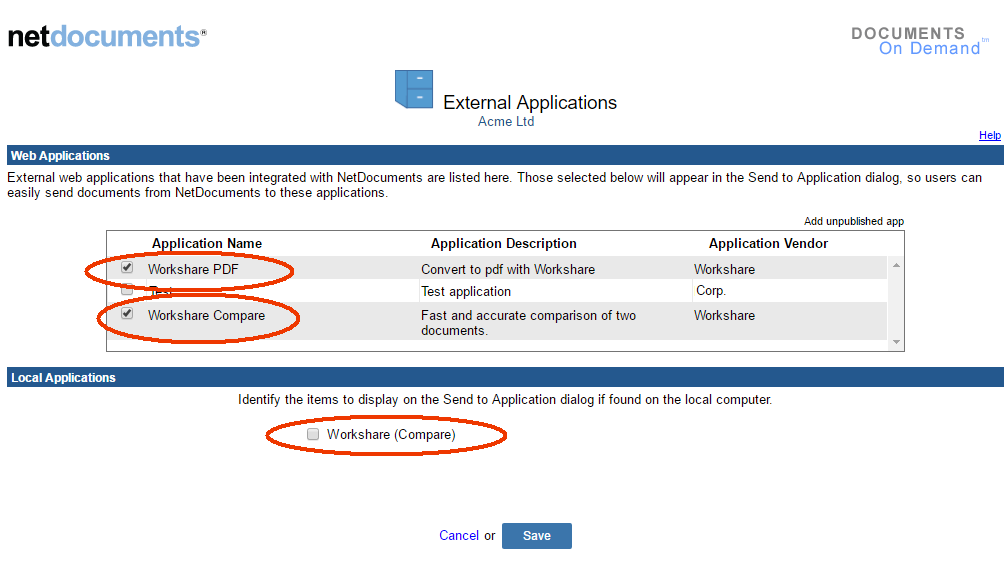
- Make sure Workshare Compare and Workshare PDF are selected in the Web Applications section and that Workshare (Compare) is deselected in the Local Applications section.
Note: Deselecting Workshare (Compare) in the Local Applications section ensures there is not an additional unnecessary “Workshare” entry in the Send to Application dialog.
- Scroll down and click Save.
- Scroll to the bottom of the cabinet page and click Submit.
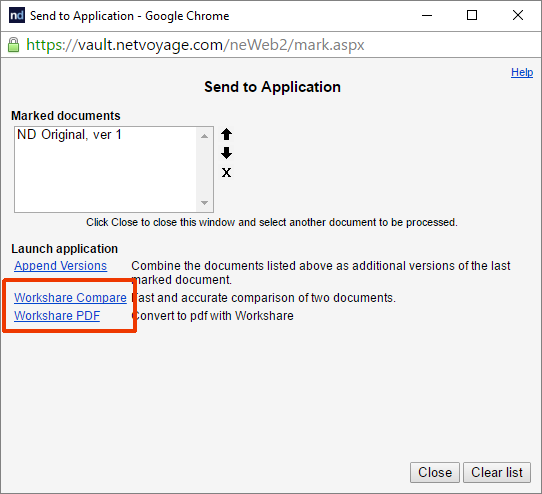
Now when a user selects the Send to application option in NetDocuments, Workshare Compare and Workshare PDF are listed as available applications.