If you're using...
Workshare integration with OpenText
Microsoft Internet Explorer, Mozilla Firefox, Google Chrome, Apple Safari, Opera
eDOCS DM 5.3.1. COM only (Patch 1, Patch 3, Patch 4) |
Workshare's integration with OpenText enables you to send and share an OpenText file or folder with multiple people. You can share an OpenText file or folder by:
- Sending it to an existing folder in Workshare that's already shared
- Sending it to a new folder in Workshare that you create and share during the send process
To send a file or folder from OpenText to an existing folder in Workshare:
- Open OpenText.
- Navigate to your file or folder.
- Right-click the file or folder.
- Click Send to Workshare.
- If you're not currently logged into Workshare, the login page is displayed and you must log in. If you are logged in, go to step 6.
- Once logged in, the Choose Workshare Destination dialog is displayed showing the current folders in your Workshare space.
- Select the folder where you want the file/folder to be added and click Send. The file or folder is copied to the selected folder in Workshare. If you select a shared folder, the file or folder you are adding will also be shared with the members of the selected folder.
Notes: You cannot select a folder for which you do not have permission to add files/ folders.
To create a new folder for your file or folder, click Add New Folder (see next procedure).
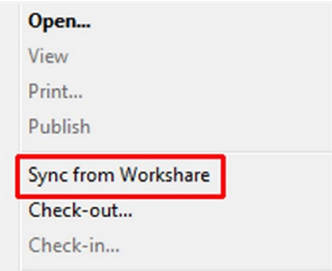
Now the context menu will display Sync from Workshare.
Note: The versioning of the document will be done according to OpenText version settings procedures.
To send a file or folder from OpenText to a new folder in Workshare:
- Click the dropdown arrow to the right of the file or folder to display the context menu.
- Click Send to Workshare from the options displayed.
- If you are not currently logged into Workshare, the login page is displayed and you must log in. The Choose Workshare Destination dialog is displayed showing the current folders in your Workshare space.
- Click Create New Folder. The New Folder dialog is displayed.
- Enter a name and description for the folder. Note: If the folder name is identical to another folder in Workshare the new folder will be renamed to [name] (1).
- If you do not want to share the new folder with anyone at this stage, click Create Folder and the folder is created in Workshare with the selected OpenText file or folder copied into it. To share the new folder, select the Permissions tab.
The permissions for a folder relate to how other users can access the folder and apply to all files and subfolders contained in the folder. If it is a subfolder, you can select the Use the values from the parent folder checkbox.
- Set the permissions as required.
| Get return receipt: | Select to receive an email once users invited to share the folder have accessed the file. |
| Users must login to access folder: | Select to ensure that users invited to share the folder must be registered Workshare users and must log into Workshare in order to access the file. |
| Members may invite others to this folder: | Select so that users invited to share the folder can invite other users to share the folder who will then be able to access the file. |
| Members can access these files until: | Select and specify an expiry date for the file. After this date, users invited to share the folder will no longer be able to access the file. |
| Add or remove files: | Select so users invited to share the folder can add files to or remove files from the folder. |
| Add versions to these files: | Select so users invited to share the folder can add versions to the files within the folder. |
| Download files: | Select so users invited to share the folder can download the file from Workshare. |
- Select the Share tab.
- Enter the email address of the person you want to invite to access the folder. You can enter multiple recipients, separated by a semicolon.
- In the Subject field, enter a relevant subject line for the email. This will appear in the subject field of the email the recipient receives.
- In the Message field, enter a relevant message that will appear in the body of the email the recipient receives.
- Click Create Folder. The folder is created in Workshare with the selected OpenText file or folder copied into it. If you have specified to share the folder, invites are emailed to the specified recipients.
In OpenText, the Workshare logo is displayed to the right of the file or folder to indicate is has been sent to Workshare. Now clicking the context menu will display Sync from Workshare.

