If you're using...
Workshare Professional/Protect 8 |
When the Send and Protect button is enabled, it sits above Outlook's
Send button:
When the user clicks Send and Protect, a policy will be applied to their email and attachments; if the user clicks
Send, no policy will be applied.
You can also use the Send and Protect button in addition to one of these email policy configurations:
- Interactive protect
- The protect profiles
- The email security dialog, when it's used instead of the protect profiles
- A transparent dialog (the user doesn't see any dialog)
In this case, if the user clicks
Send and Protect, the Send and Protect Policy will be applied to their email and attachments; if the user clicks
Send, the other configuration will be triggered and its policies applied to the email and attachments. Send and Protect uses different policy options than the other configurations, so it's possible to have two different email policies available to the user.
Follow these steps:
- Open the Workshare Configuration Manager:
- Go to Start.
- Click Programs.
- Click Workshare.
- Select Workshare Configuration (User Mode).
- Select whether you'd like the changes to apply to your current user profile or for all users on your machine:
- For the current user on the machine (the user's profile), go to step 3.
- For all users on the machine (roaming application data), select Launch Administrator Mode.
- From the Protection options, select Administration.
- Choose one of the following:
- If you would not like the button to be available, deselect Display Send with Protect button (Outlook).
- If you would like the button to be available in addition to one of the other the Protection options, select Display Send with Protect button (Outlook). Find out how to switch between Interactive Protect, the Protect Profiles, the Email Security Dialog and no dialog.
- If you would like the button to be available instead of the other protection options:
- Select Display Send with Protect button (Outlook).
- Deselect the Apply Workshare Protect option for Internal Email.
- Deselect the Apply Workshare Protect option for External Email.
- If you're using admin mode and you'd like to prevent the user from changing these options in user mode, click the lock icon. If not, go to the next step.
- Click Apply.
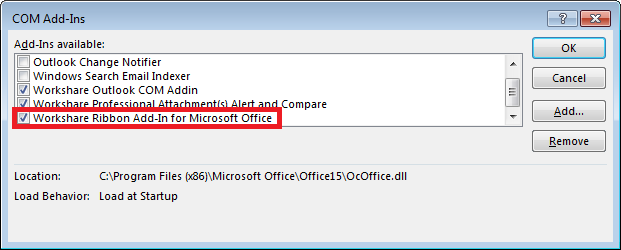
Note: If you've followed the steps above and you're still unable to see the Send and Protect button, ensure that the Workshare Ribbon Add-in for Microsoft Office COM Add-in is enabled in Outlook.