If you're using...
Workshare Professional/Compare 7-9 |
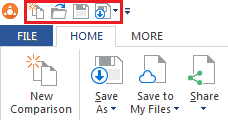
In Workshare Compare, the Quick Access Toolbar (QAT) provides one-click access to Compare functionality.
You can change which buttons appear in the QAT. To create a custom QAT:
- Open Workshare Compare.
- Click the QAT down arrow, located to the right of the QAT.
- Make your changes.
- Close Workshare Compare.
If you're an admin and you'd like to deploy your QAT across your company:
- After you've followed the steps above, locate the registry key with the QAT settings in it:
- For Workshare 9, locate the BCGRibbonBar-59398 key: HKEY_CURRENT_USER\Software\Workshare\DeltaView\Workshare Compare\BCGWorkspace\BCGRibbonBar-59398
- For Workshare 7-8, locate the MFCRibbonBar-59398 key: HKEY_CURRENT_USER\Software\Workshare\DeltaView\Workshare Compare\Workspace\MFCRibbonBar-59398
- Export the key and save it to your desktop as QuickAccessToolbar.reg.
Note: Editing this key manually is not recommended because your settings are kept in the QuickAccessControls sub-key.
- Manually or via a login script, import the QuickAccessToolbar.reg key into the Windows Registry of the other machines. When you open Workshare Compare, the QAT should now reflect your settings.
Note: The registry key must be deployed after your users launch Compare for the first time or your custom QAT will be overwritten by the default Workshare QAT. If you'd like to deploy the registry key before your users first launch Compare, you'll need to contact us to get a modification for the registry key. Raise a case on our support portal, quoting "Change Request #164172".
